Getting started
Create your first event
Create a Gathmo event, choose guest upload options, test the QR flow, and review plan and privacy settings before sharing with guests.

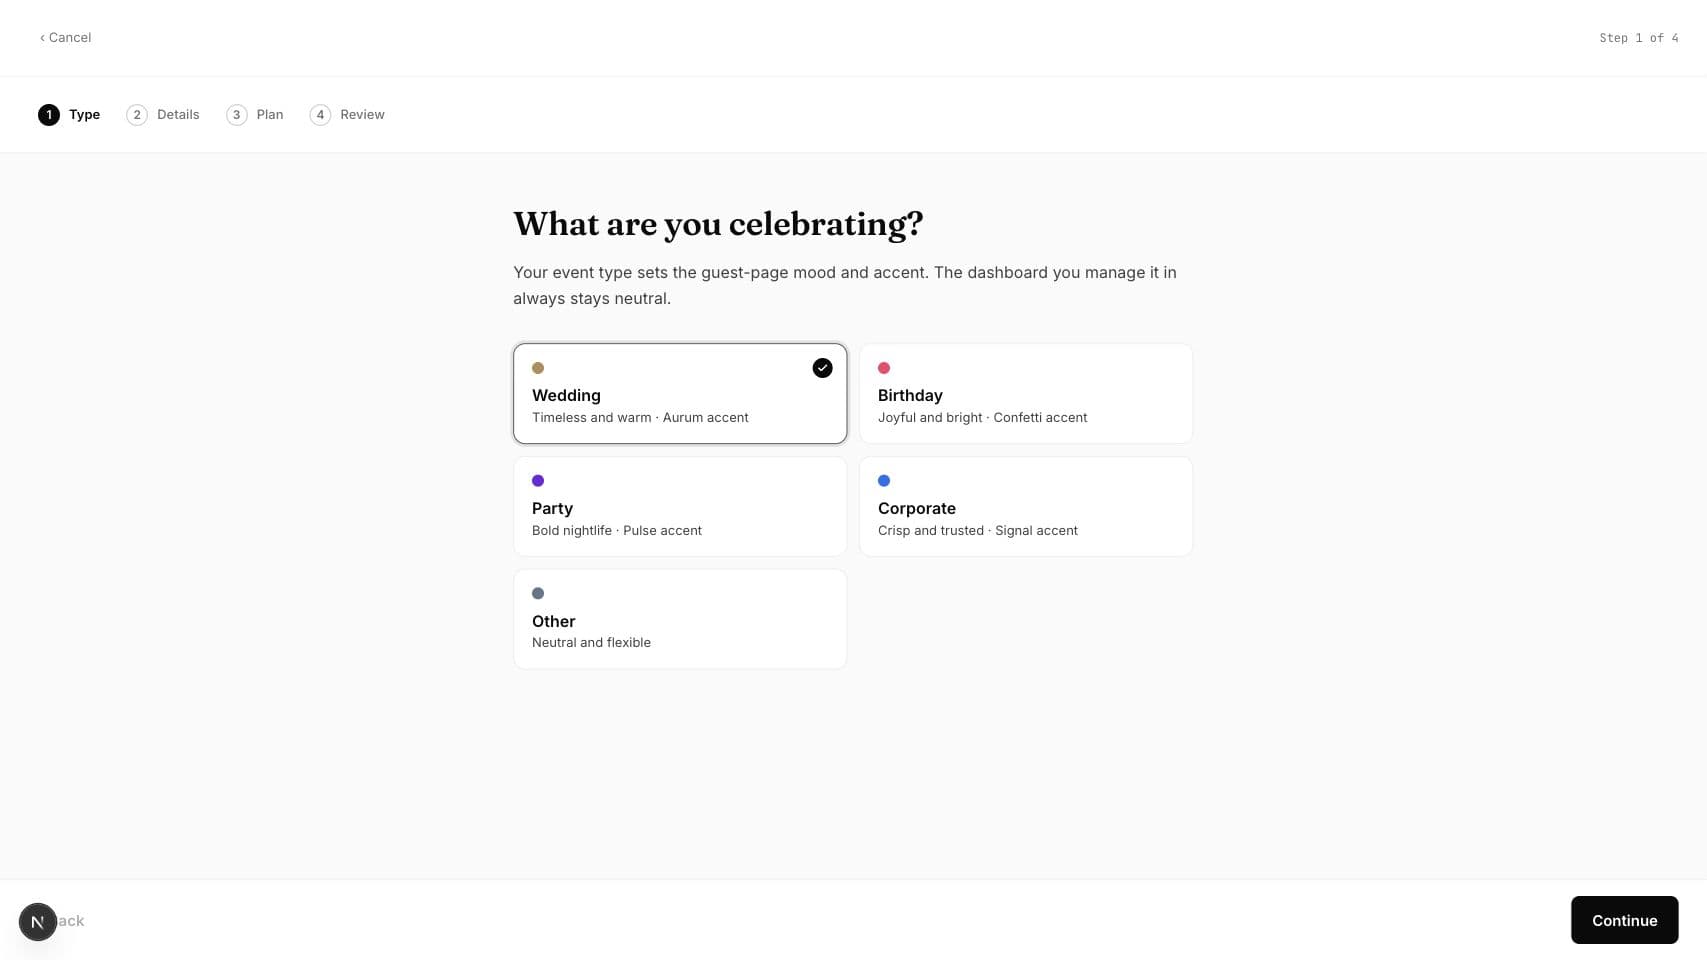
Create the event first, then choose what guests can upload. After that, test the QR code yourself before sharing it with guests.
Before you start
- Sign in to the Gathmo dashboard.
- Know the event name and date.
- Decide whether guests should upload photos, videos, voice messages, or all three.
- Open the correct Gathmo event, workspace, or account before making changes.
Steps
Open the dashboard and start a new event
From the dashboard, choose the option to create a new event. Use a clear event name, because this name appears in your dashboard and helps you find the event later.
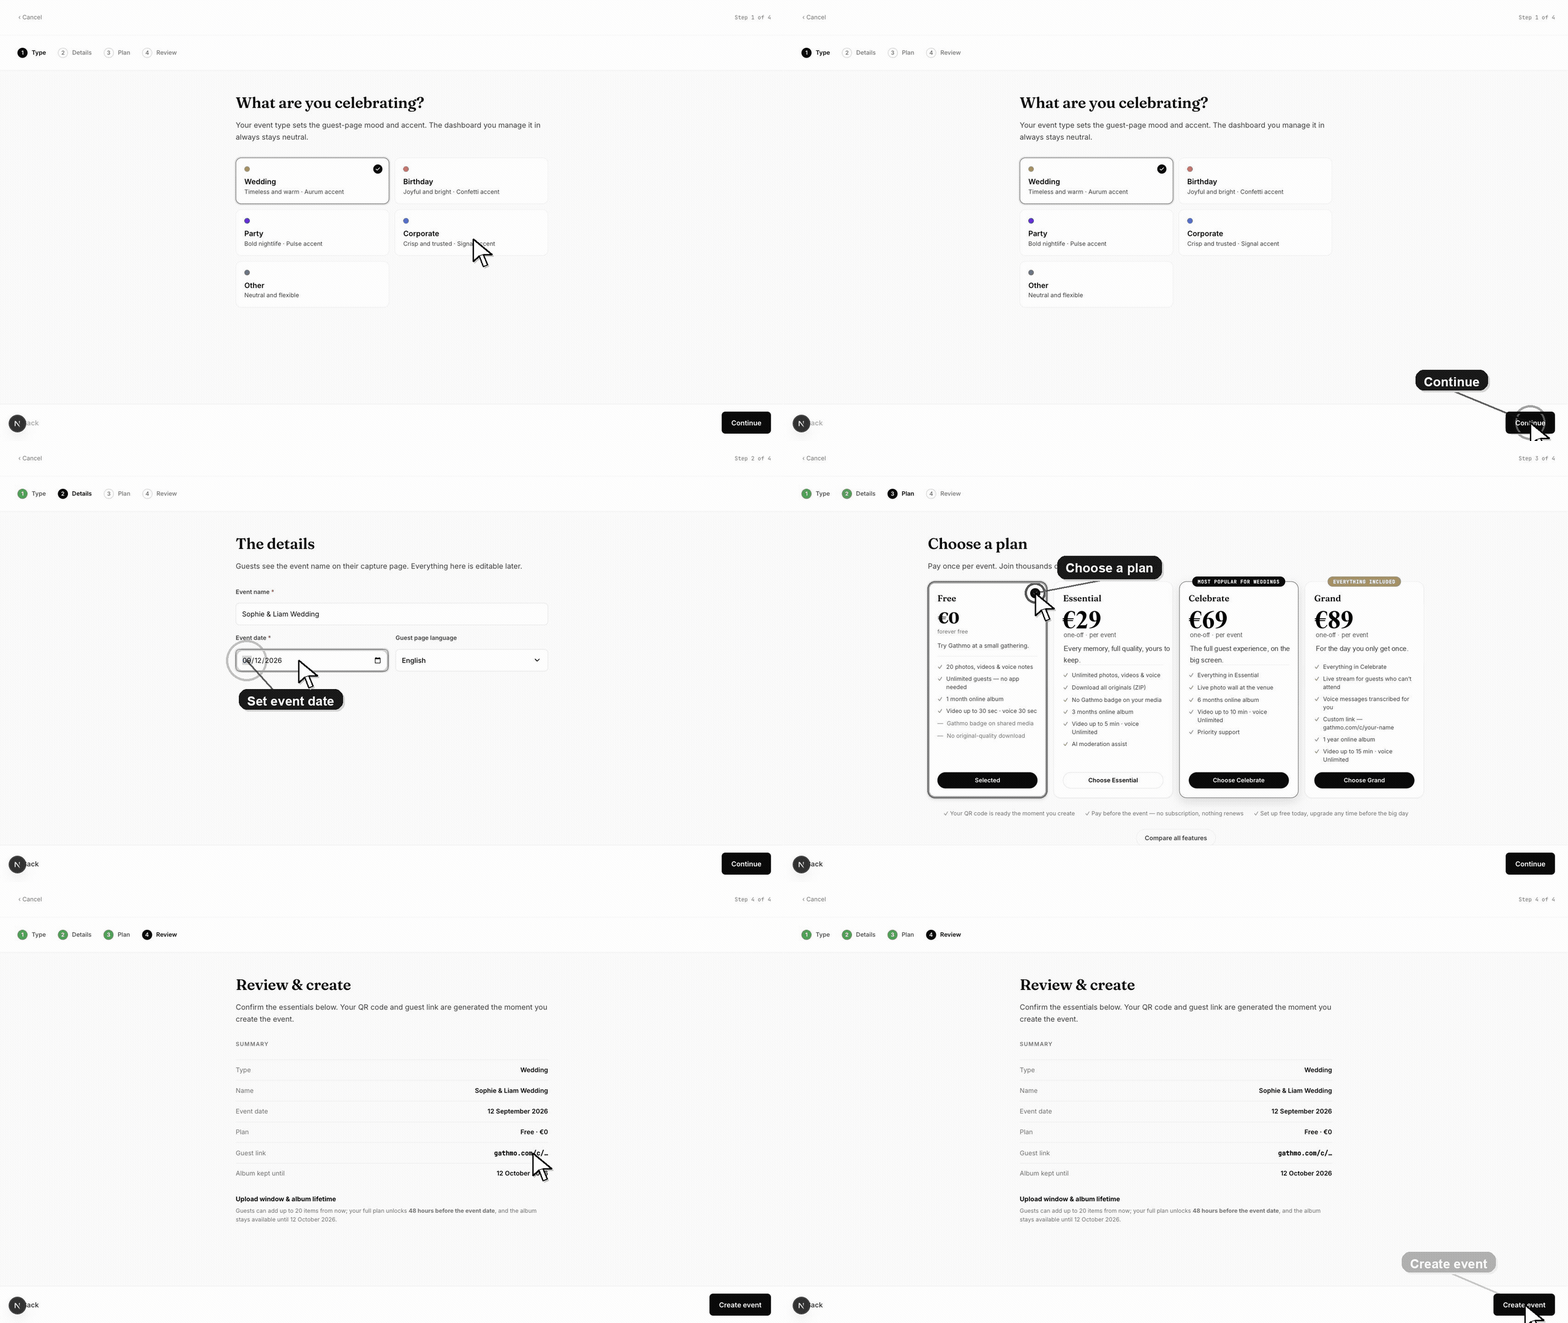
Add the event details
Use the Details step to name the event, set the date, and choose the guest-page language. Upload options can be tuned later in event settings.
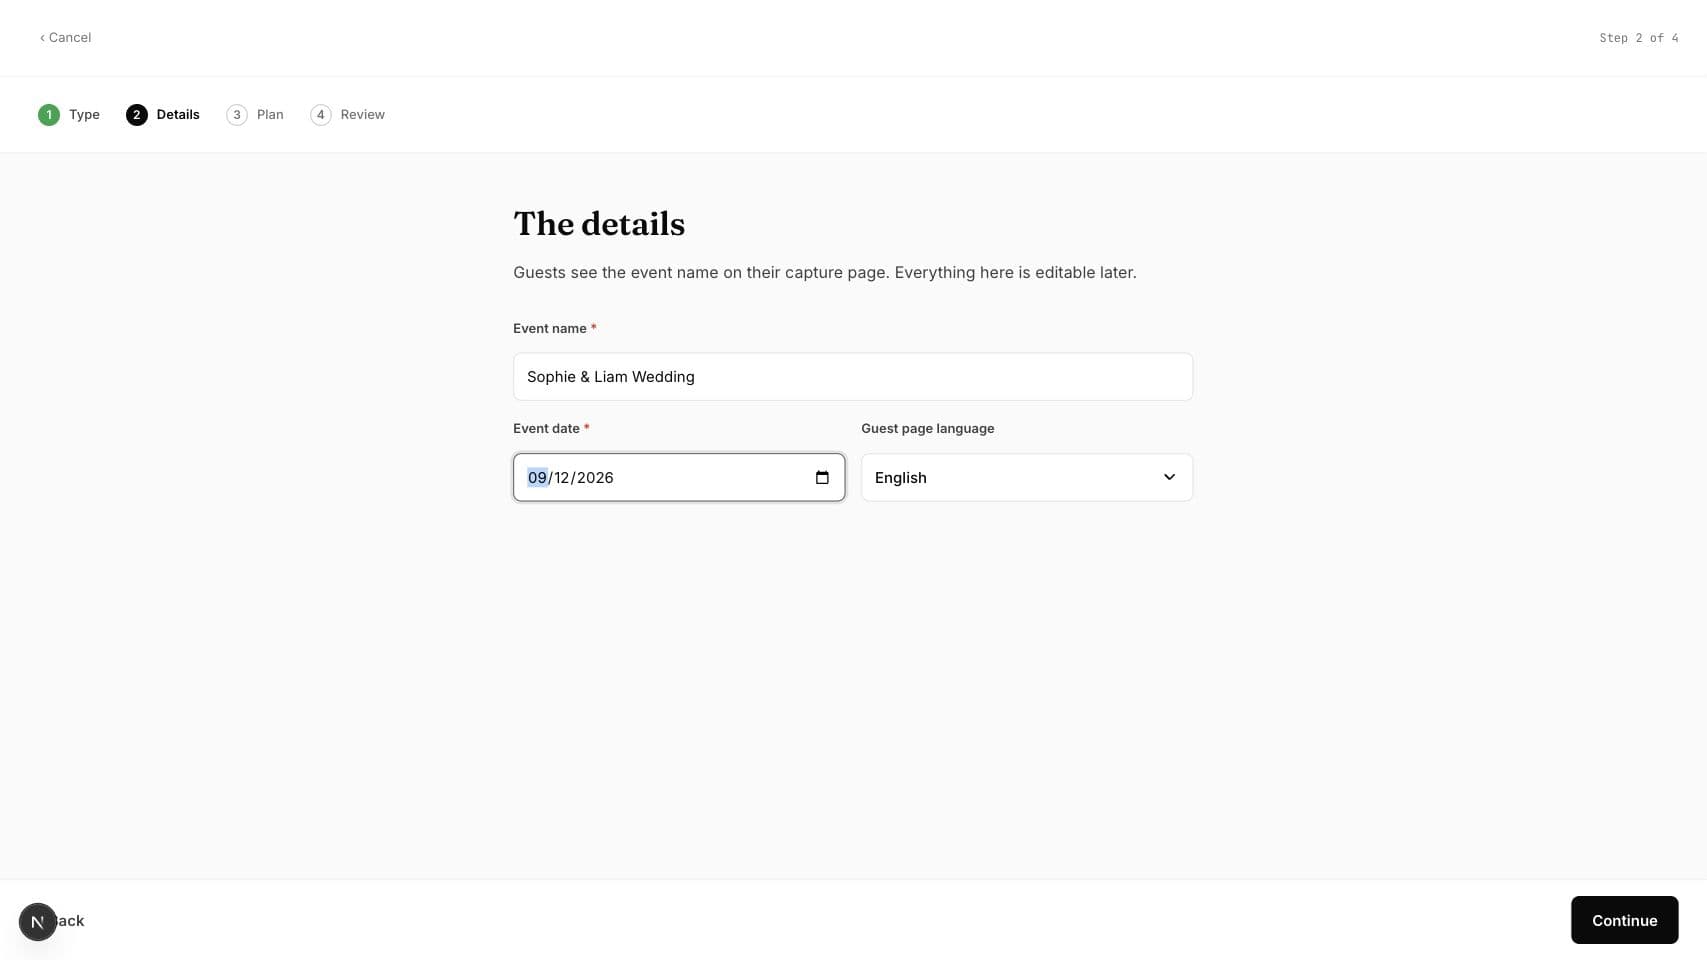
Choose the plan for the event
Pick the plan that matches the event size. The Free plan is enough for a small test, while paid plans unlock higher limits and longer retention.
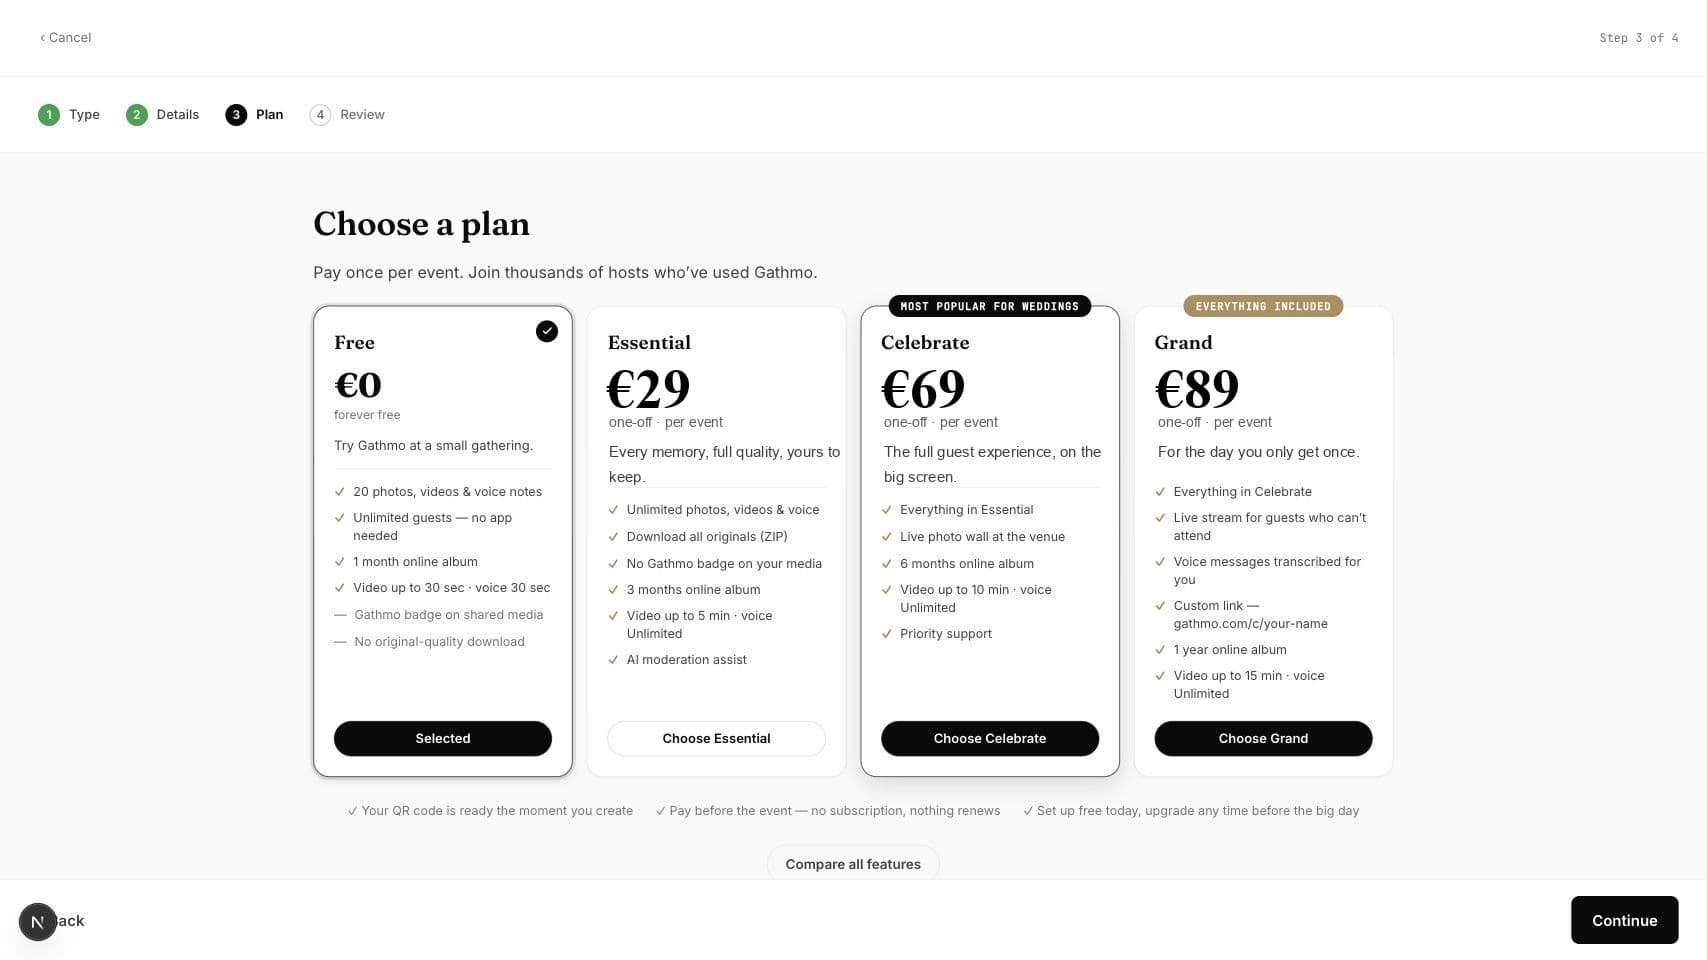
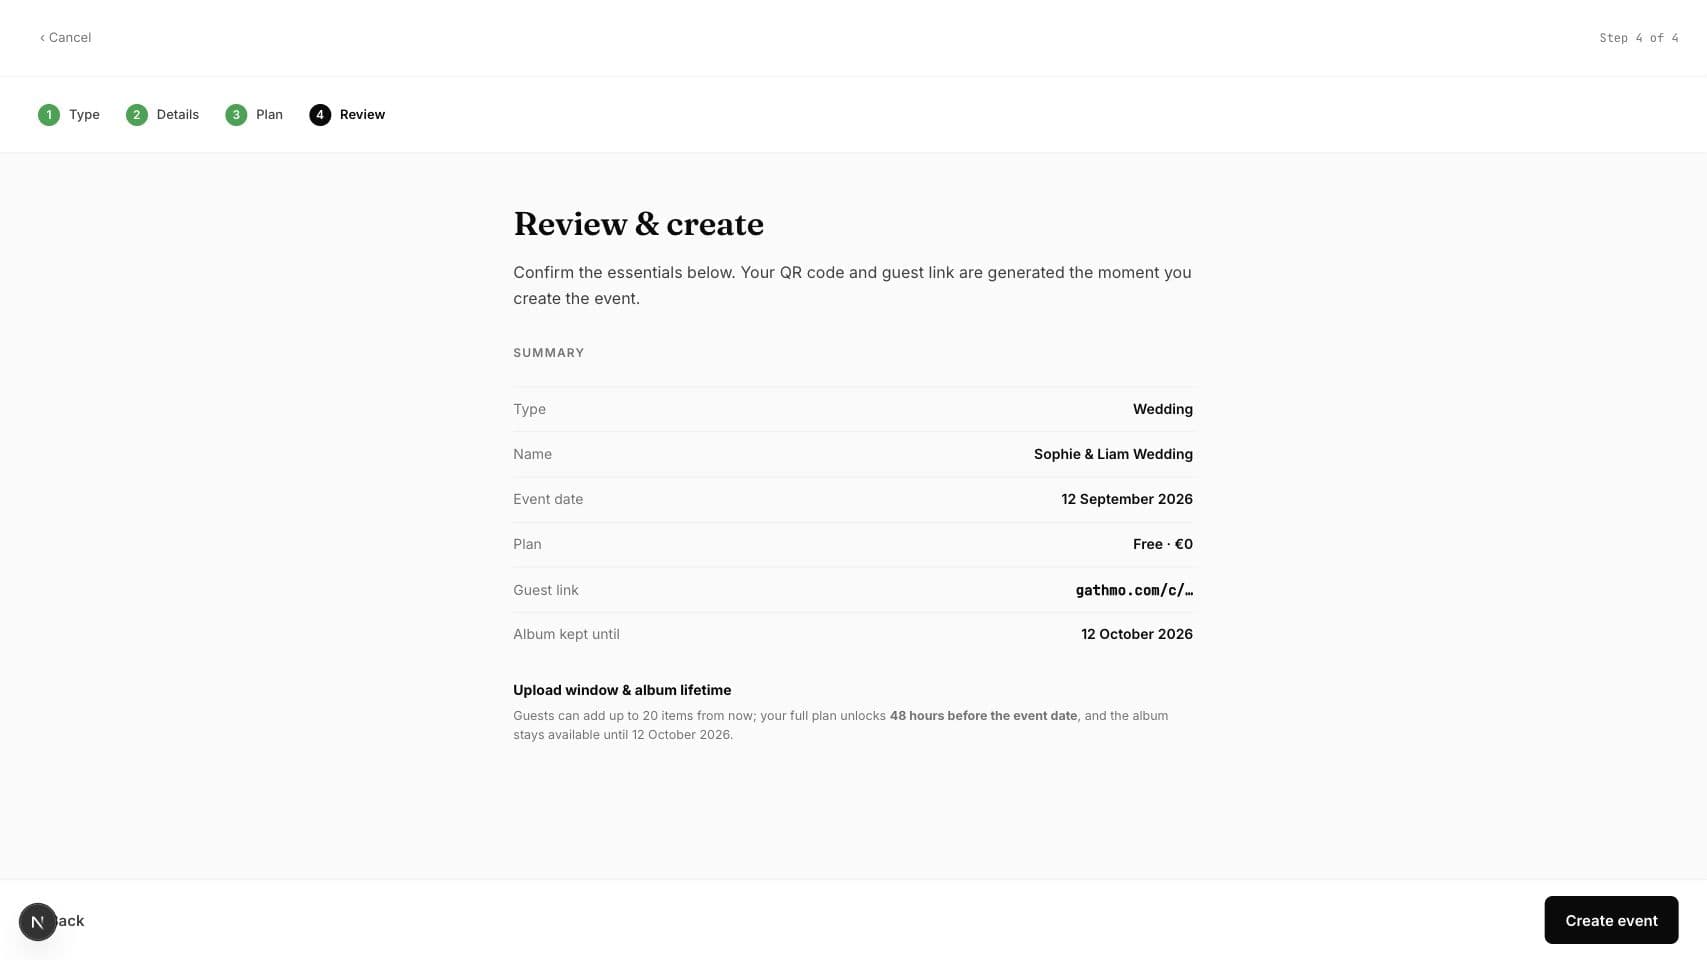
Review and create the event
Check the summary before creating the event. The QR code and guest link are generated after the event is created.
Test the guest-facing result
Open the QR code or guest link on a phone and complete the exact guest action the article describes. This confirms that the public flow matches the dashboard settings before guests see the event.
What to do next
- Print the QR code for table cards, welcome signs, or invitations.
- Add one short instruction line so guests know what to do.
- Keep the dashboard open during the event if you want to review uploads live.
- Run the same flow once from a phone, because the host dashboard and guest page solve different parts of the setup.
Frequently asked questions
How do I create my first Gathmo event?
Open the Gathmo dashboard, start a new event, choose the event type, add the event name and date, choose a plan, review the summary, and create the event. After creation, Gathmo generates the guest link and QR code.
When do I get the QR code for my event?
The QR code is generated after you create the event. Review the event details first, then download and test the QR code before printing it for guests.
Can I change the event details after creating it?
Yes. You can edit event details such as the name, date, language, and upload settings later from the event dashboard. Always re-check the guest page after important changes.
Which Gathmo plan should I choose for a test event?
Use the Free plan for a small test event or internal trial. Choose a paid plan when you need higher upload limits, longer retention, original-quality downloads, or premium event features.
What should I test before sharing the QR code with guests?
Scan the QR code on a phone, open the guest page, upload a test photo or video, and confirm that the upload appears in the dashboard. This catches QR, language, and moderation issues before the event.
Troubleshooting
Regenerate or re-download the QR code from the correct event before printing.
Check whether moderation is enabled. If it is, approve the upload from the dashboard.
Add a simple prompt near the QR code, such as "Scan to share your photos, videos, and voice messages."
Refresh the page, confirm you are signed in to the correct Gathmo account, and open the exact event from the dashboard. If the event was created by another team member, ask them to confirm your role before changing settings.
Guest uploads can contain personal data. Before sharing the QR code publicly, check your privacy settings, moderation choice, and retention plan.
Keep going