Guest uploads
How guests upload photos
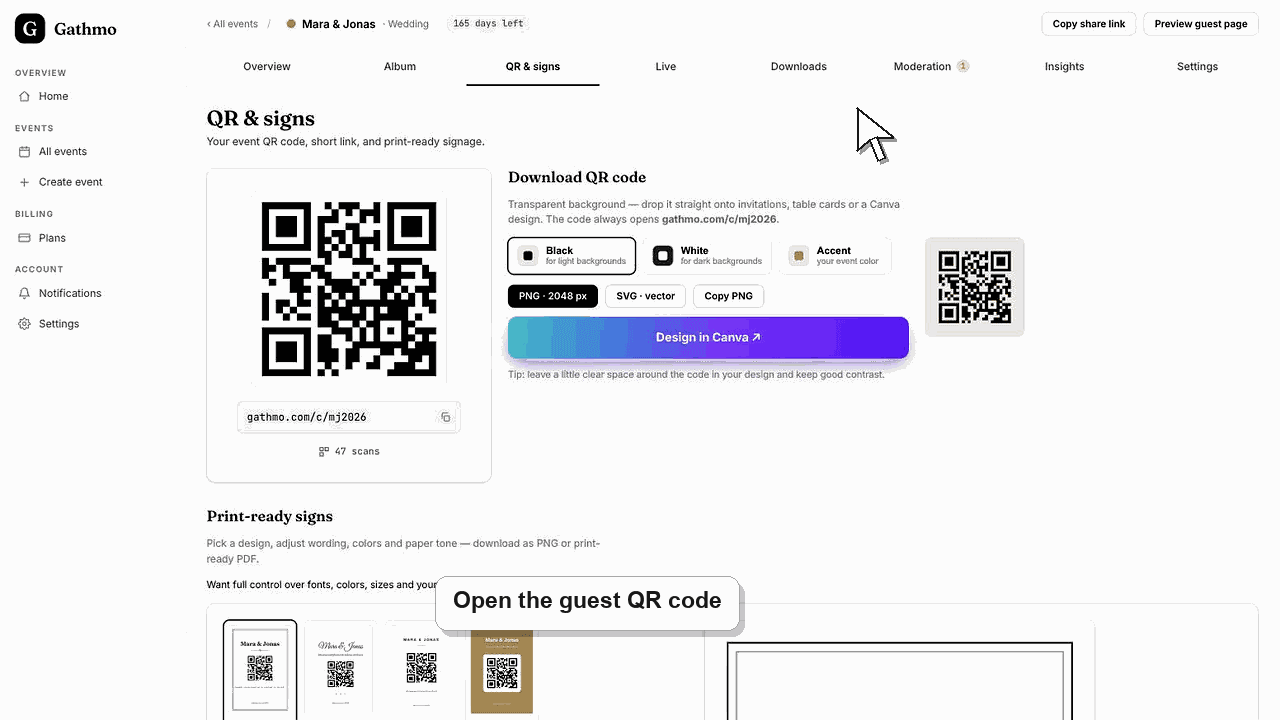
Show guests how to scan a Gathmo QR code, open the upload page, and add event photos from their phone without installing an app.

Guests scan the QR code, open the upload page in their browser, choose photos, and submit them to your private event gallery.
Before you start
- Open the correct Gathmo event and confirm photo uploads are enabled.
- Keep the event QR code or guest link ready on a phone for testing.
- Decide whether uploaded photos should appear immediately or wait for moderation.
- Decide whether guests should confirm their consent before uploading or leave their name afterwards. Both are off by default and can be switched on in the event settings under "Guest upload steps".
Steps
Open the event QR code or link
Ask the guest to scan the event QR code or open the guest link from their phone. The page should show the event name and the available upload options without asking for a Gathmo account.
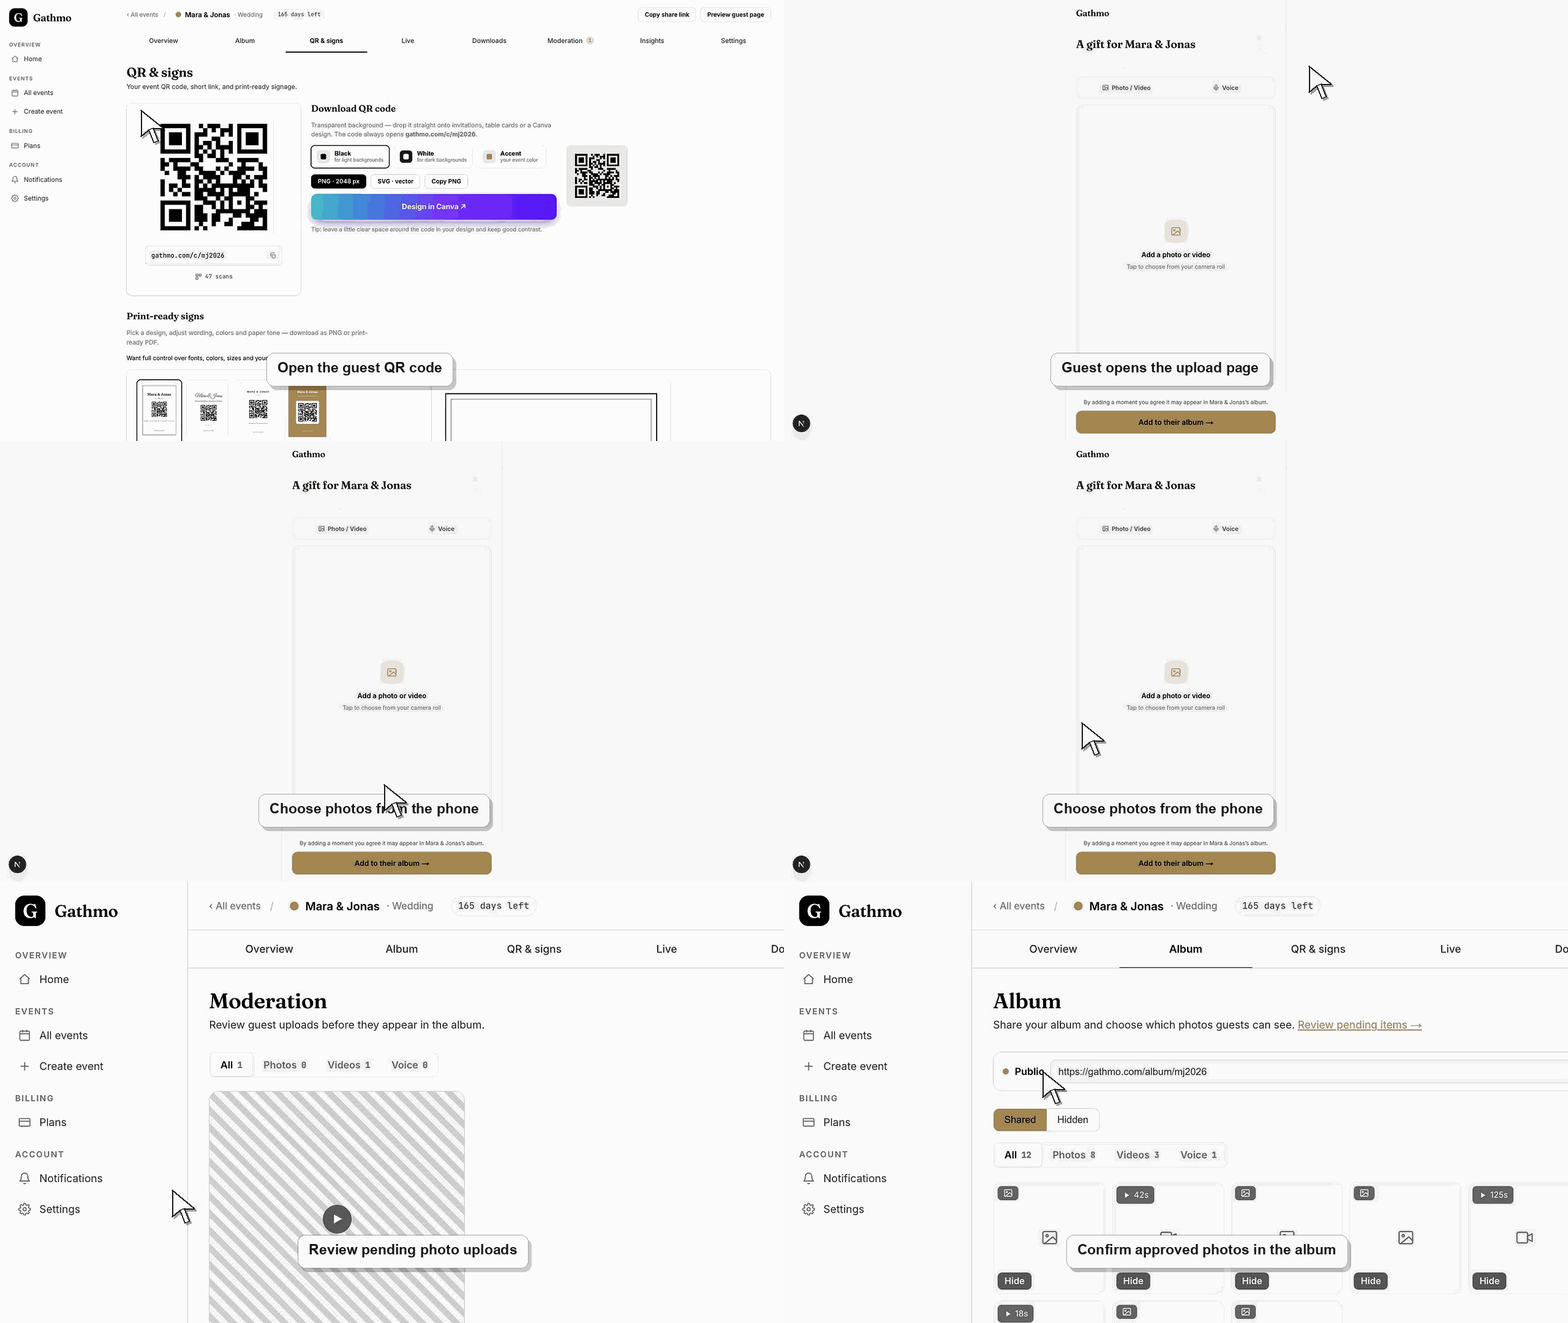
Choose photos from the phone
The guest selects the photo upload option and chooses one or more images from the phone library or camera. If the browser asks for photo access, the guest must allow access for that upload. By default the photos are sent straight away. If you switched on "Ask guests for consent before they upload" in the event settings, a short consent sheet appears first and the guest confirms it before anything is sent.
Wait until the upload finishes
The guest should keep the page open until the upload confirmation appears. Closing the browser too early, switching networks, or locking the phone can interrupt larger photo batches. If you switched on "Ask guests for their name after they upload", the confirmation page also asks for the guest’s name; they can skip it.
Review pending photos in the dashboard
If moderation is enabled, open the event dashboard and review the new photos before they appear in the shared gallery or live wall. Approve only the photos that should be public.
Check the gallery from a guest view
Open the guest-facing gallery or album and confirm approved photos appear in the right place. This final check proves that the upload, moderation, and public gallery settings all work together.
What to do next
- Place the QR code where guests naturally pause, such as a table sign, welcome area, or bar.
- Add a short instruction like "Scan to upload your photos. No app needed."
- Review early uploads during the event so any moderation or connection issue is caught quickly.
- Run one guest upload from an iPhone and one from Android if the event team has both available before the event.
Frequently asked questions
Do guests need an app to upload photos?
No. Guests scan the QR code or open the event link and upload photos from their phone browser.
Can guests upload more than one photo?
Guests can choose photos from their phone and submit them through the guest upload page. Check the event plan and upload settings for current limits.
Where do guest photos appear after upload?
Guest photos appear in the event dashboard. If moderation is enabled, they wait for review before appearing in the shared gallery.
What if a guest cannot upload a photo?
Ask them to reopen the guest link in a browser, check mobile data or Wi-Fi, and try a smaller file if the first upload fails.
Do guests have to agree to anything or enter their name?
Not unless you want them to. The consent prompt before the upload and the name question after it are both off by default. You can switch either one on in the event settings under "Guest upload steps"; the change applies to the next guest who opens the page.
Troubleshooting
Ask the guest to reopen the page in Safari or Chrome, allow photo access when prompted, and avoid private browser modes that can block file selection on some phones.
Keep the browser open, move to a stronger network, and try a smaller batch first. Very large files or weak venue Wi-Fi can make uploads appear stuck.
Check moderation, hidden uploads, media filters, and the public gallery view. If moderation is enabled, photos wait in the dashboard until a host approves them.
Check the event upload settings in the dashboard, confirm the upload type is enabled, and reload the guest page. If the guest is using an old link, send the current event link again.
Photos can include faces, children, venues, and private moments. Use moderation when uploads should be reviewed before appearing in a public gallery or live wall.
Keep going